
Getting started with veewee and vagrant
What do you need to do to get a fully automated kickstart of a virtual machine on your local development platform running? Not much it turns out. There are some tricks to get around but after that it’s all fine.
The resulting image can also be used to get a system in production.
I will look at the OS installation part. Puppet will come in a later post.
Installation
Tools we will play with:
- rvm
- VirtualBox
- VeeWee
- Vagrant
Simple first step: get VirtualBox from Oracle and instal it. Make sure you get the latest version.
Next up is rvm the tool to manage the ruby version your ruby code needs (or so). Read about rvm.
$ \curl -L https://get.rvm.io | bash -s stable --ruby
The above line will do the trick to get you the latest version of rvm installed. This may take a while.
Now we come to the meat:
VeeWee: the tool to easily build vagrant base boxes or kvm,virtualbox and fusion images
VeeWee will build the basebox containing our operating system which will be booted on the commandline in virtualbox via vagrant. ;-)
VeeWee is written in ruby, so it’s time to get your previously installed rvm in place.
- If you use rvm for the first time you might need to do an addtional install of the needed ruby version.
- Drink coffee
As the docs of veewee mention:
The Veewee project is moving quickly and the Rubygem might be outdated. We recommend installing Veewee from source.
So your first steps would be:
$ git clone https://github.com/jedi4ever/veewee.git
$ cd veewee
$ gem install bundler
$ bundle install
This takes a moment and you are all setup for building a basebox for vagrant fully automated.
Still in the VeeWee source directory you can define boxes. They do have many templates available. Pick and choose you want to use from the templates directory. VeeWee will copy the template to the definitions directory.
veewee vbox define 'CentOS-6.4-x86_64-minimal' CentOS-6.4-x86_64-minimal
If you issue now a
veewee vbox build 'CentOS-6.4-x86_64-minimal' --workdir=/Users/oliver/Source/veewee --nogui
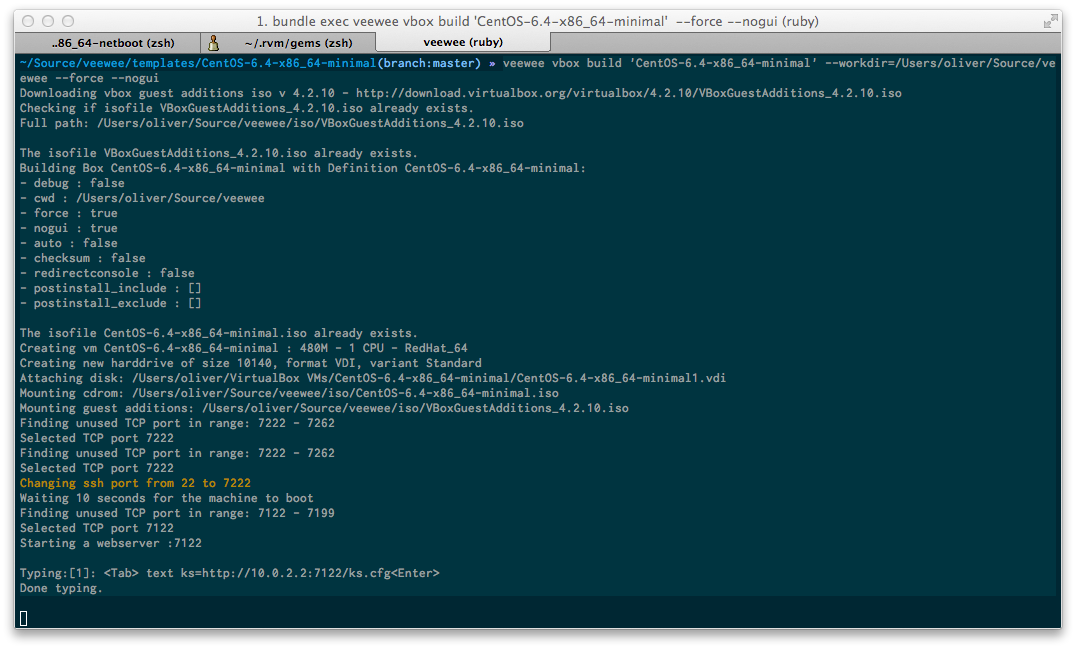 It will build a minimal box with CentOS 6.4 in VirtualBox. If you want to see what it is doing don’t run the above command with
 --nogui.
VeeWee will download the Operation System iso image plus the GuestBoxAdditions. It will cache it for use with other definitions. Isos are placed in the iso directory.
Drink a cup of coffee. This will take a while.
After VeeWee is done the machine is running. You can ssh into it with:
ssh -o UserKnownHostsFile=/dev/null -o StrictHostKeyChecking=no -p 7222 -l veewee 127.0.0.1
You should not make any changes to it, just shut it down. Any manual change would defeat the principal of automating it.
To export the box do a:
veewee vbox export CentOS-6.4-x86_64-minimal
Make sure you have the latest vagrant version installed. Sometimes it is picky about the VirtualBox Version.
To import it into vagrant type:
vagrant box add 'CentOS-6.4-x86_64-minimal' '/Users/oliver/Source/veewee/CentOS-6.4-x86_64-minimal.box'
To use it in any directory:
vagrant init 'CentOS-6.4-x86_64-minimal'
vagrant up
vagrant ssh
This creates a default ‘Vagrantfile` in this directory. It contains the definitions of the box, like image, network config and puppet config. After that it will create a Virtual Machine in VirtualBox and boot its up. Ssh to it and you are all set.